Pexels There are plenty of macro objects to choose from in Microsoft Access such as message box, group, add the menu, beep, and dozens of others. These macro objects can stand alone or be assigned to run within other macro objects. Below are the steps used in this tutorial to create and run a macro. Step 1. Select the Macro Button Step 2. Select a Macro Step 3. Add Attributes Step 4. Saving the Macro Step 5. Testing the Macro Step 6. Running the Macro Object
Step 1. Select the Macro Button
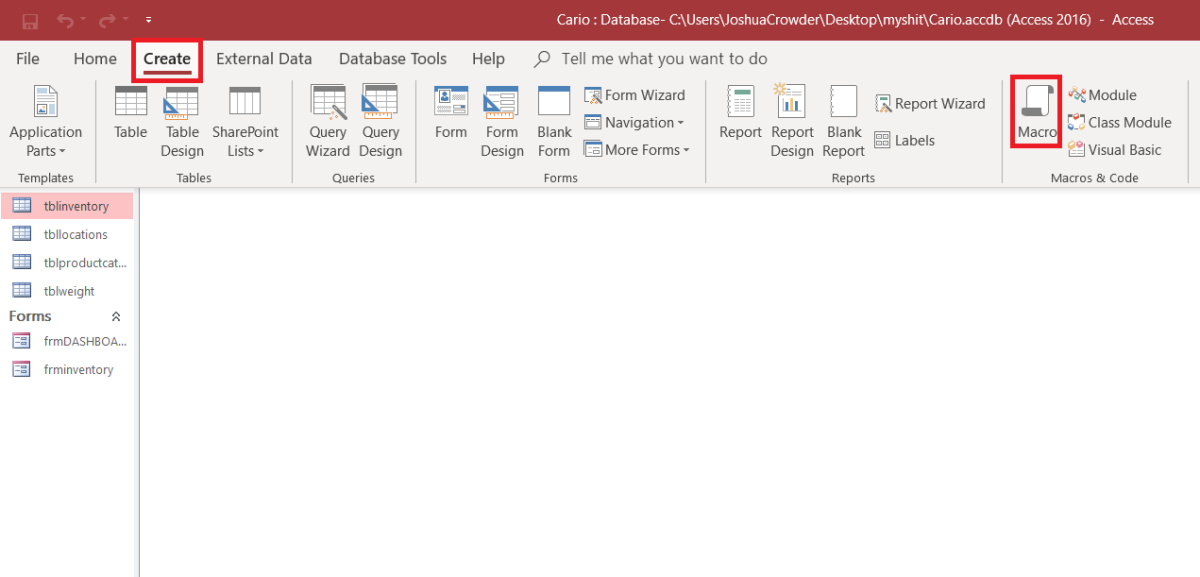
To add a macro object you must first click on the create tab followed by clicking on the macro button. The macro button can be found in the “Macros & Code” section of the ribbon at the top right-hand area of your Access screen.
Macros and Code
Step 2. Select a Macro
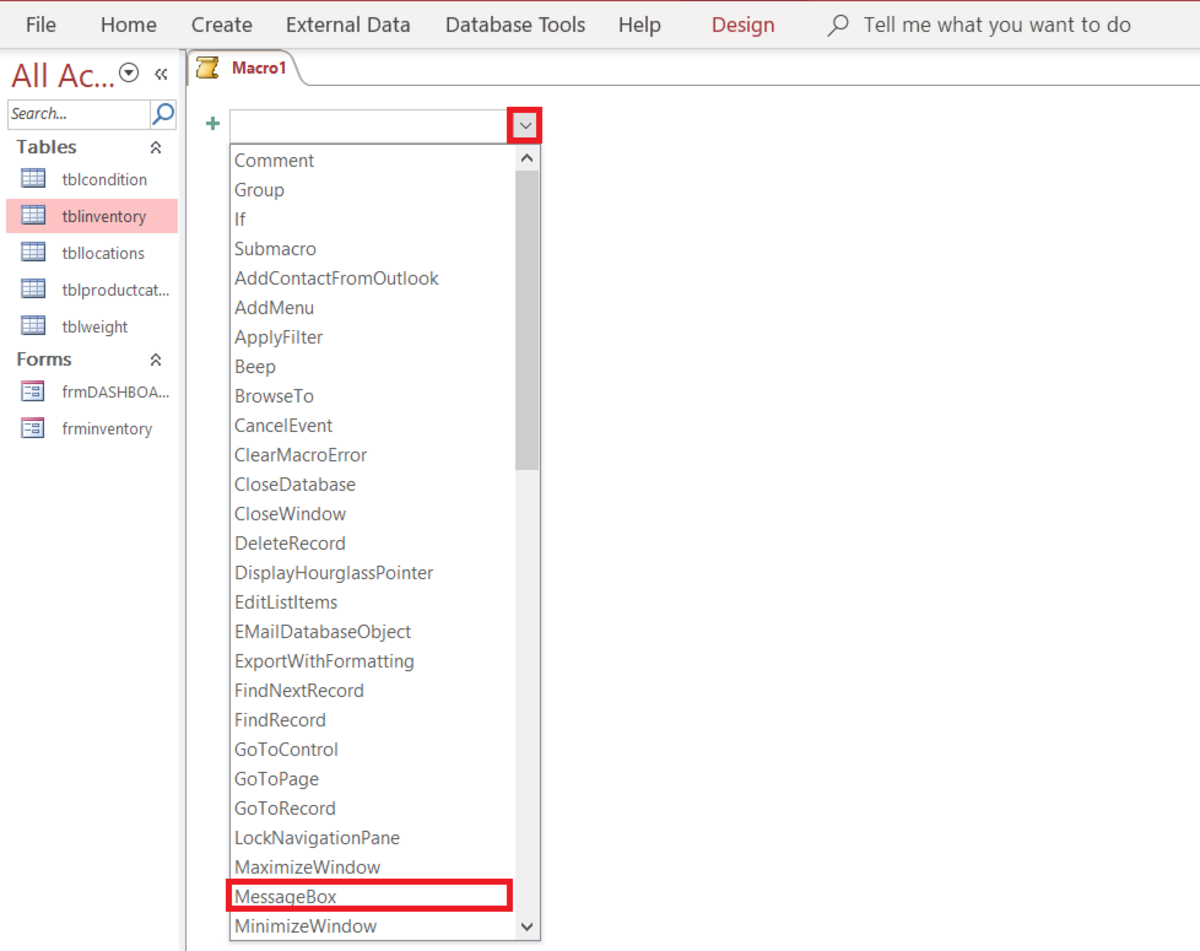
After executing the macro button from the ribbon, the design view will open. To choose a macro, you’ll want to click on the down arrow next to the blank field to show a list of available macro objects. For the sake of simplicity, the example in this article will show a simple user interface macro as an example. Select “message box” from the drop-down to show its options.
The Macro Tab
Step 3. Add Attributes
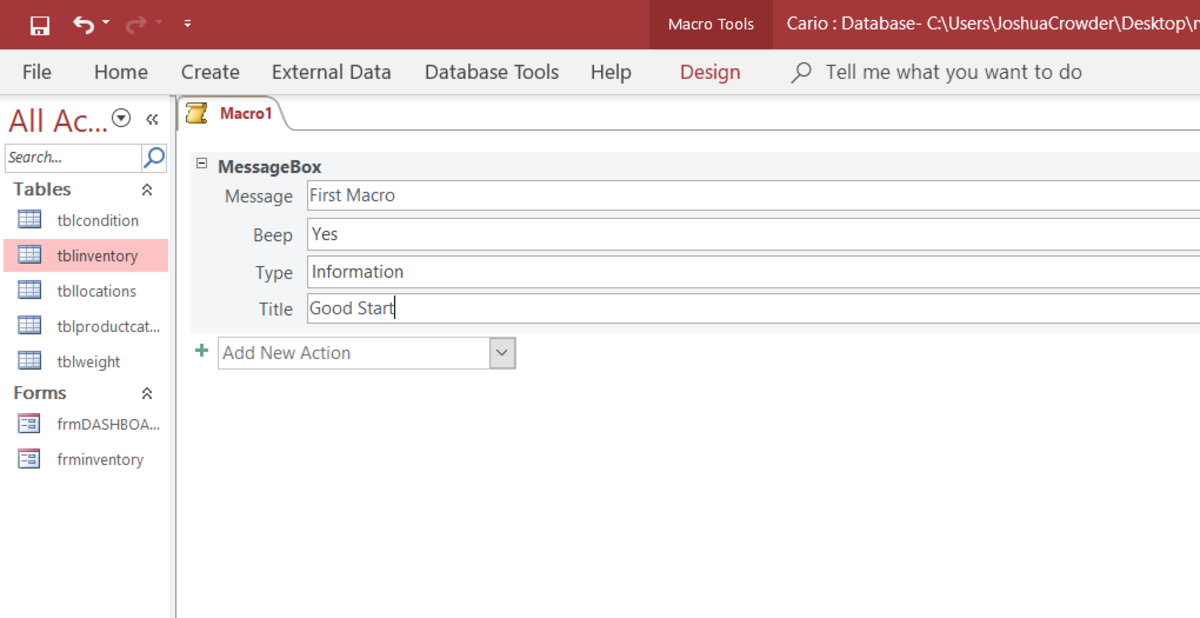
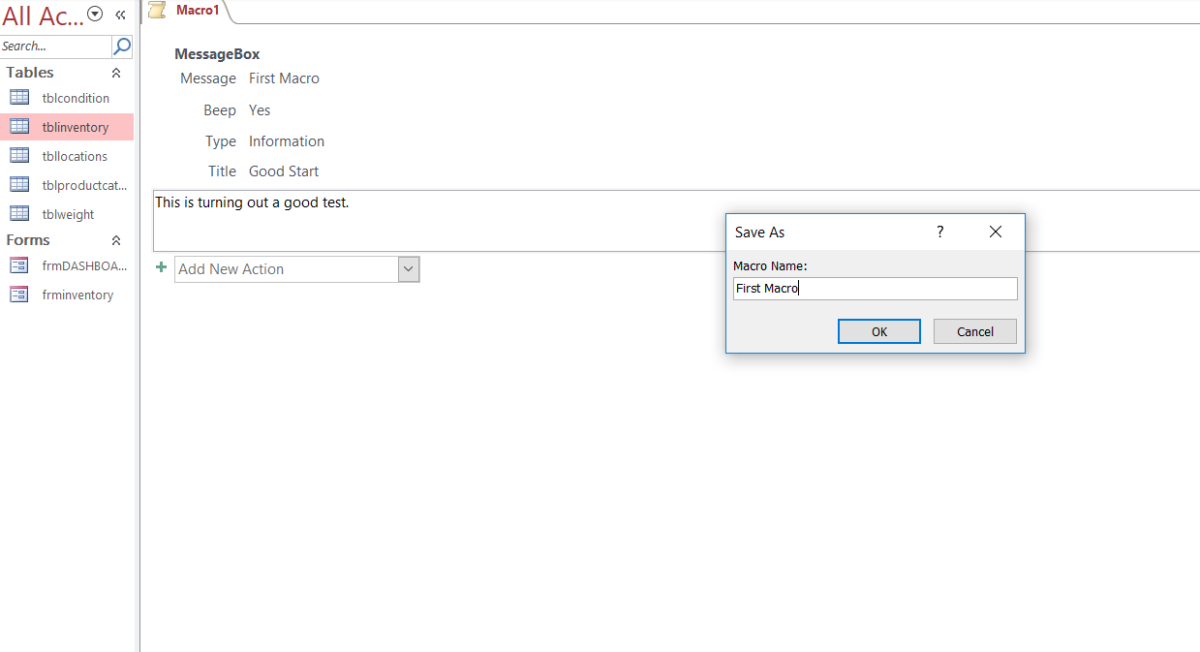
At this point, you should see MessageBox in bold at the top of the Macro tab Named “Macro1.” In this section, attributes need to be added to the macro so it can be customized. For this message example, “First Macro” is used as the message, the default yes is used for the beep, information was selected for type, and “Good Start” was added as an optional title.
Customizing the Macro
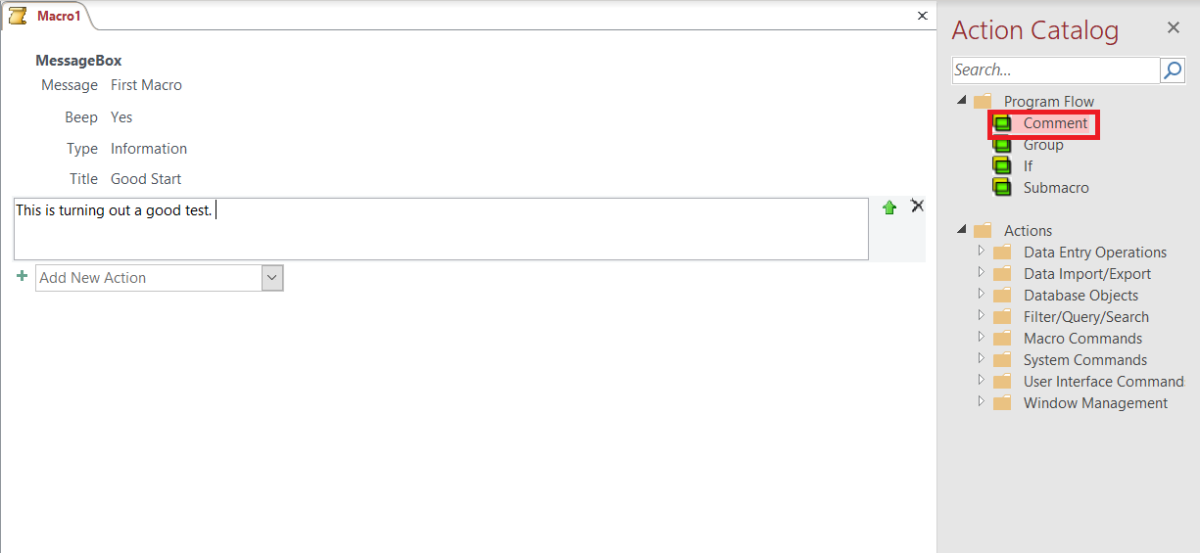
Adding a Comment Block to the Macro
It’s a good idea to add notes about the macros that you create. This can be easily accomplished by adding a comment block. In the comments, you can describe what the macro is intended to do or what you can do with the macro. Add a comment block by double-clicking on “Comment” from the action catalog. When you click off the macro the comment text turns green making it easily distinguishable from the other text data.
Step 4. Saving the Macro
Now that your macro is complete it should be saved. To do so, press ctrl+s and a save as window will appear. Note that this same action can be achieved by clicking the save button in the ribbon or right-clicking on the macro tab and selecting save. Name the macro and click the OK button. A new group will appear in the left action pane called macros.
Step 5. Testing the Macro
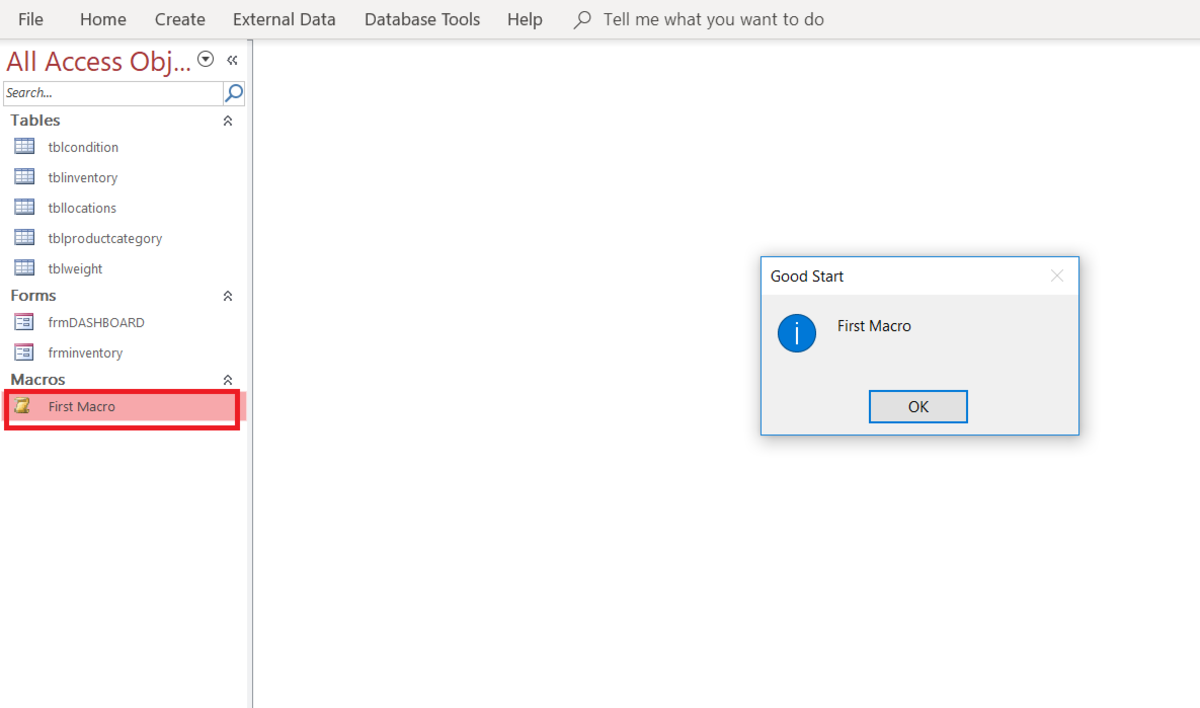
Now it’s time to test the macro to see if it works as intended. Close the macro by right-clicking on the tab and selecting close. Under the macro section in the left pane, double-click on the macro. This will trigger the macro to run and the message box will appear.
Designing an Automated Process
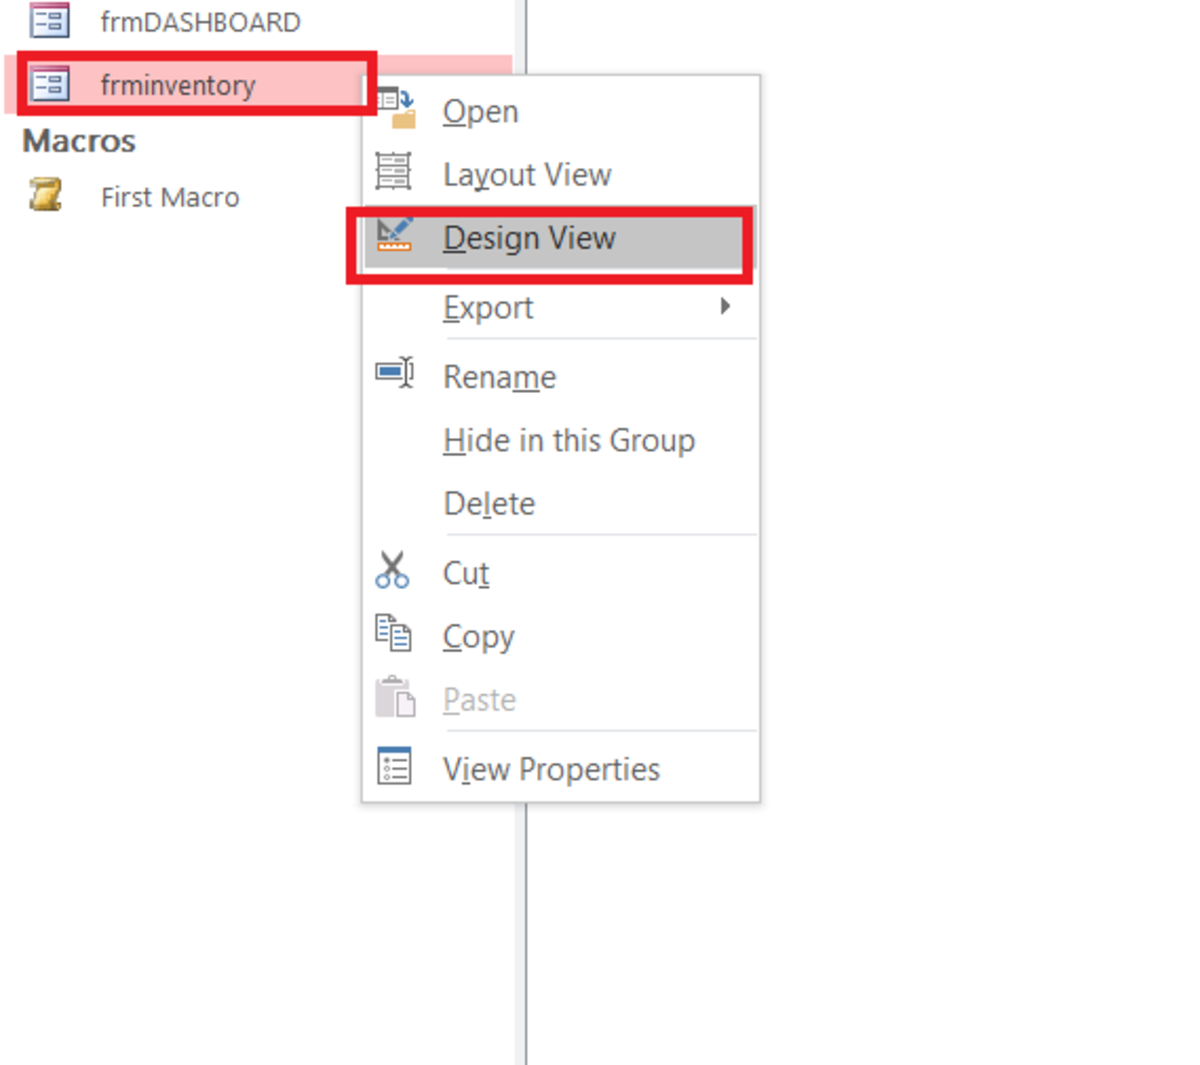
Clicking in the Access objects pane is an easy way to test the macro, but this is not an automated process. Macros are great for automation and are best for this use to save time and enhance the workflow of the database. A message box could be a great way to send a reminder to the users of a database when they open a form. It could serve as an indication that an error occurred, or that caution should be taken in certain areas. Adding a message box to a form is a simple task and will be used as an example below. Perhaps every time a certain form is opened we want the message box to appear. To set the macro up to do this we must first right-click on the form where we want it to appear and click design view.
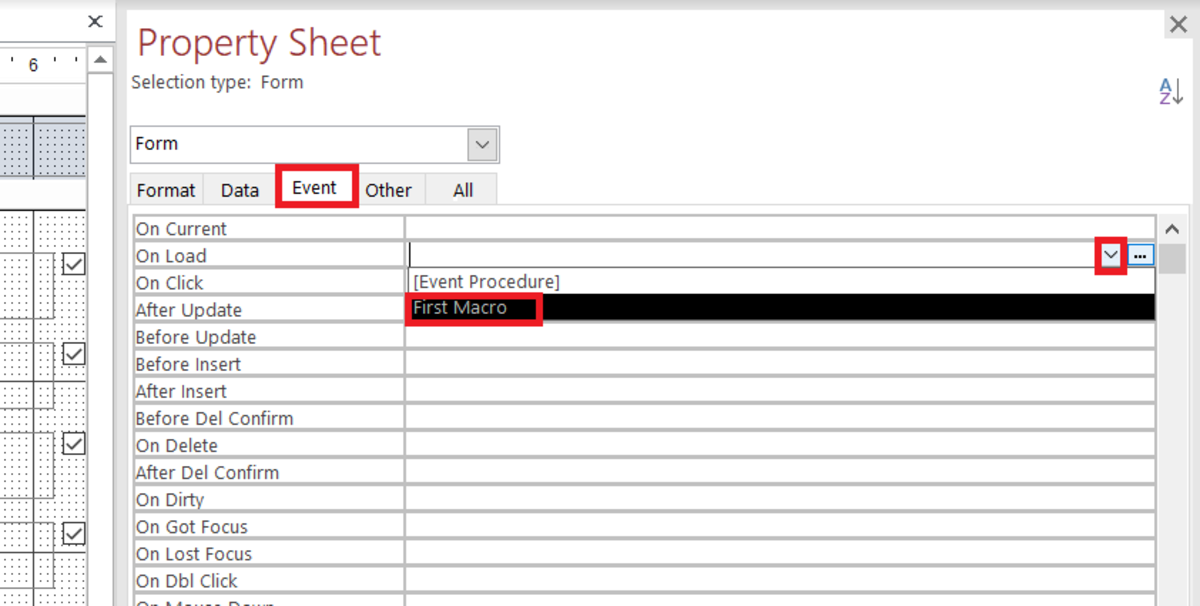
Step 6. Running the Macro Object
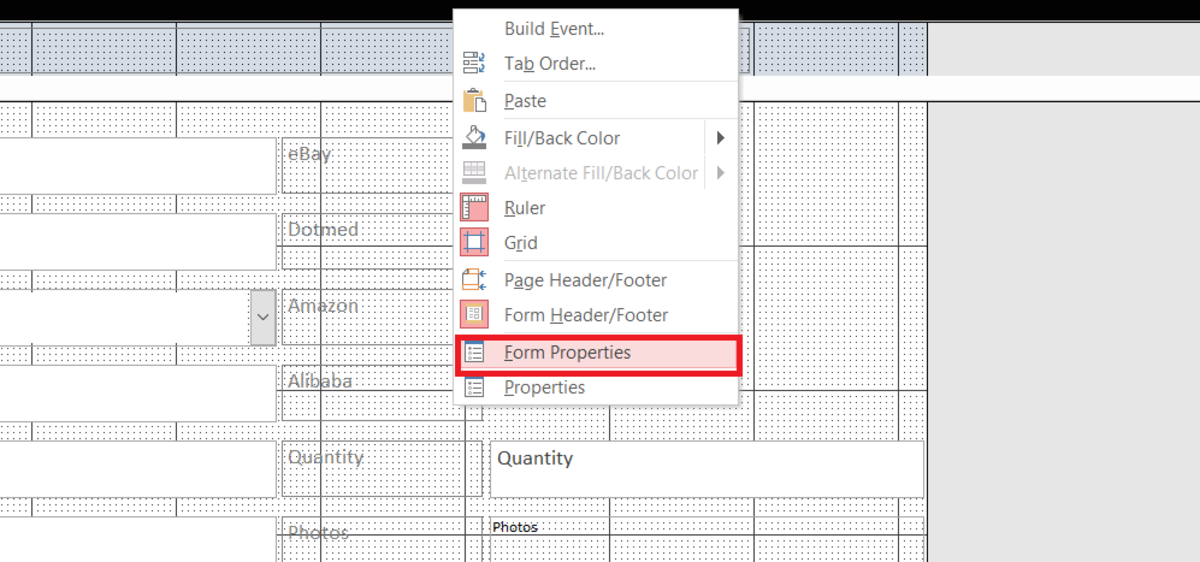
Now that the design view is enabled, we can edit the form properties by right-clicking inside the form and selecting the form properties selection. There will be a lot of options available in each tab of the properties sheet. Click on the event tab and then click on the down arrow in the blank field next to on click. If we chose our macro, the event will occur each time the form is opened. There are plenty of other ways to trigger a macro to run. Test some other options on the events list. How the macro is triggered really depends on your needs or the needs of the database user to know which one to select. You may also elect to have a macro run when a button is clicked. This content is accurate and true to the best of the author’s knowledge and is not meant to substitute for formal and individualized advice from a qualified professional. © 2020 Joshua Crowder